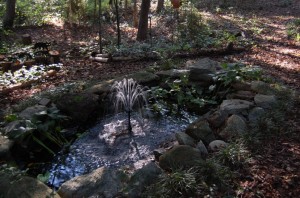
On our lot in a subdivision, I have 4 small artificial garden ponds. My wife likes the sound of falling water so 3 of the ponds have a pump to create a fountain or waterfall. As the water circulates, the stuff that falls in the pond eventually ends up trying to go through the pump.
I have spent a bundle of money over the years replacing pumps that have become clogged or jammed. In an attempt to avoid this, I have put filters on each of the pumps. The pump filters need periodic maintenance. I have discovered that during the spring, summer and fall, the right period is once per week. If weather does not permit doing it each Saturday, it can go one more week but no more. By the end of the second week, the filters are so filled with stuff that the pump is straining with reduced flow and there is the possiblility of jamming on something that would normally wash through.
The largest pond has a few goldfish. They winter over as it is warm enough here that the pond does not stay iced over. As the main problem with the filter and pump on this pond is brown algae, cleaning once a month is frequent enough in the winter.
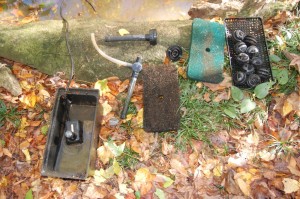
This set up was purchased as a unit with a filter box, a pump, tube, assortment of fountain heads, coarse filter media, fine filter media, and something called bio-filter balls. I believe these are intended to provide a place where beneficial organisms can attach and aid with the chemical balance in the water. Since the garden pond is large and replenished with rain water, I have never been too concerned about the chemistry of the water. Except that if I do have to add significant amounts of tap water, I use a conditioner to control chlorine.
The spray head makes an a spray which is too large in height (it blows away) and size (lands outside the pond) if unregulated. There is an adjustment that allows some water to bypass the spray head to control the size of the fountain plume.
To maintain this pump, first turn off the power. The circuit has a switch at the deck.
Next lift the filter box out of the pond. Wire bails have been added to help with the lifting.
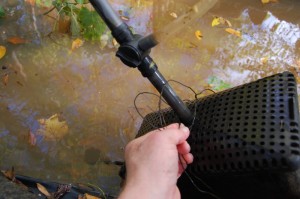
First remove the fountain pipe at the joint in the middle of the pipe just below the regulating valve. Gentle twisting may be required to get the valve to separate from the lower pipe.
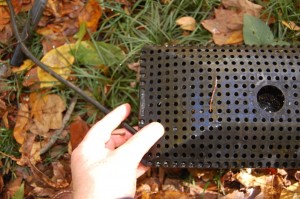
Next remove the filter cover. A tab at each end of the filter cover keep the cover on the filter box. These need to be lifted slightly away from the box to release the cover. Inside you will find the coarse filter media (brown). Remove this layer. Use a hose sprayer set to “Spray” to wash all of the algae and leaf material out of the coarse filter. Wring the media to get the water out once or twice and rinse until the water runs clear. Repeat for the fine (green).
Underneath the fine filter media are the bio-filter balls.
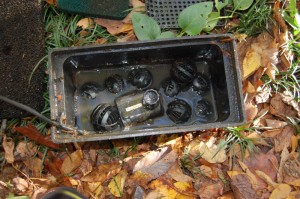
Remove each of the balls and rinse it with the hose spray.
The spray fountain needs to have the top cover removed from the bottom part. This is done by gently unscrewing (top counterclockwise) until they separate. Inside you will see a labyrinth in the bottom to distribute the water and the holes in the top. Both of these tend to catch debris and need to be thoroughly cleaned. Make sure that all holes are clear. Poke them out with a toothpick if required. Re-assemble by screwing the top back on the bottom. Take extra care not to cross-thread. There is no need to screw it on tight, a bit more than a full turn is enough.
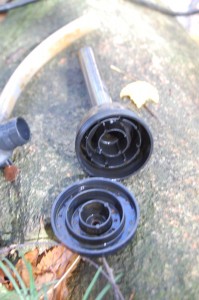
The pump is held into the filter box with suction cups. For weekly maintenance, you can just leave it in place. Rinse the box with the spray and empty the dirty water out. About once a month you will need to remove the pump from the box and clean it thoroughly. To clean the pump, insert and gently twist a screw driver in the vertical case split on the bottom on the end away from the intake and outlet. Gently slide the case apart to reveal the pump impeller. Clean any material from this area. There is normally no need to remove the impeller retainer.
If there is debris in thhttp://www.brafetishpage.com/blog/e pump impeller area, first, make sure the power is off. Then rotate the impeller retainer counter clockwise until the tabs that retain it at the edges are clear of the case. It may be necessary to pry it lightly to separate it from the bearing plate. plate. The bearing plate has an o-ring around the edge. Grasp the post in the center by the pump inlet and lift. Help it with a screwdriver if required. The pump impeller, shaft with a bearing at each end, and ferro-ceramic magnet can now be lifted out. Clean everything. Put the shaft of the magnet back in the motor. Replaces the shaft retainer, taking care to center the bearing. Do not force. Slight pressure should re-seat the o-ring. Replace the cover plate and rotate the tabs into the grooves in the case.
When the pump is clean, replace the cover and slide it to the stop.
Reverse the disassembly to assemble the pump and filter. Bio-balls, 4 in one end, 6 in the the other, fine filter, coarse filter, cover, bails. Re-insert the fountain pipe. Place the filter box on the bricks in the bottom of the pond and ensure that it is stable. Turn the power back on and check the fountain is flowing properly and that the plume is falling back into the pond.
