Garden Pond Pump Maintenance III

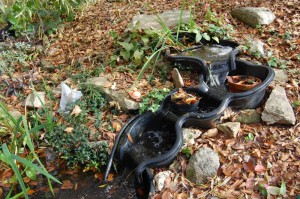
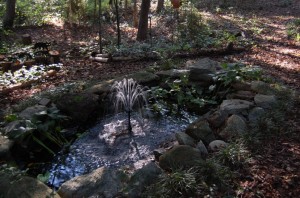
This pond is in front of the house
This little pond is in front of the house

At  the front of the house is a solar power fountain.  My wife had bought a kit from a local store about 5 years ago.  With the constant exposure to the weather and occasional freezing, the solar cell went bad.

So I needed a replacement solar cell.  How can you tell if your solar cell is bad?  If you have a multimeter [I prefer the kind with a needle because then I know it is not the battery], you can read out the voltage produced in bright sunlight.  The front of the old panel was wet on the inside and you coud see right through in places.  Time for a new one.
A little web-surfing brought up Silcon Solar . Their on-line catalog had a picture of a pump similar to mine. And a kit that included that pump with a solar cell that looked quite different. An e-mail exchange over a couple of days answered my questions and the new solar cell is in place and powering the fountain. This 18v (white and blue at left) solar cell will power the 12v pump unit just fine.

But the little 12v pump needs care too.  The sun helps the algae to grow and the rain stirs up the sand at the bottom of the pond and that can stall the pump, even with the filter.  Here is how to clean the pump in the pond at the front of the house.
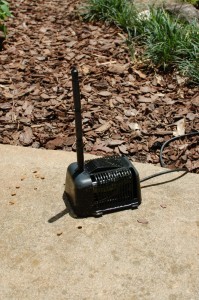
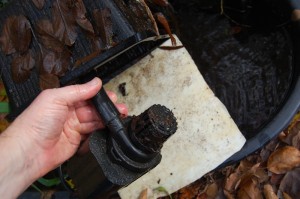
12 volt pump unit from the front pond

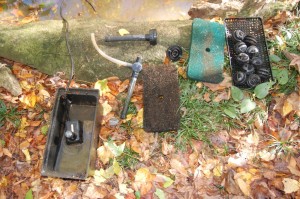
The pump unit consists of a top cover, a base plate with the motor and pump attached, the fountain tube, a wire that is connected to the power source or solar cell and what cannot be seen is piece of filter media.

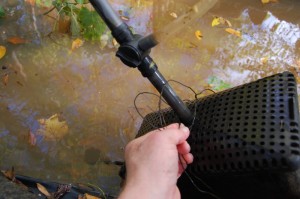
Before attempting to remove the top cover, remove the fountain tube from the pump outlet.  Be care not to bend the tube at any time.  Carefully twist and pull the tube from the pump outlet tube just outside the cover.  Once the tube is remove, the cover can be separated from the baseplate.
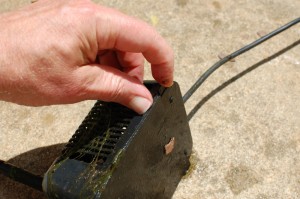
Press to separate
Press to separate

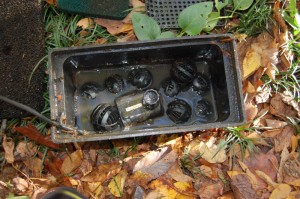
At the bottom of  the cover where it meets the baseplate  are 4 tabs.  Lifting the tabs lightly at the same time, allows the cover and base plate to separate.Removing the filter media reveals the pump components. The pump, on the baseplate consists of a cover/front half, motor-impeller assembly mounted on the baseplate.

Remove the filter medium.  Rinse thoroughly.  Wringing will shorten the life of the medium.

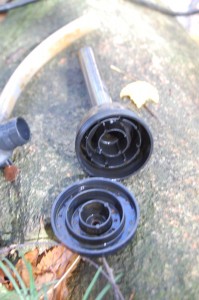
Carefully use the blade of a straight-slot screwdriver under the pump housing to remove the cover.  Rock the blade back and forth until the cover is loose.  Then lift straight off. Carefully remove any debris or algae. Rinse with pond water if required.
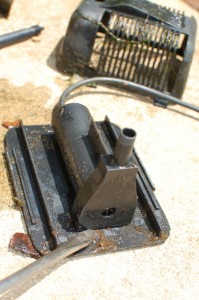

Pry up the pump cover

Test that the pump impeller turns freely by making sure that the solar cell is in full sun. The motor should run vigorously. If not check for binding due to dirt or algae. Replace the cover and insure that the pump continues to run at full speed without binding or stalling.
DSC_7384

Garden Pond Pump Maintenance II

Cascade
Cascade

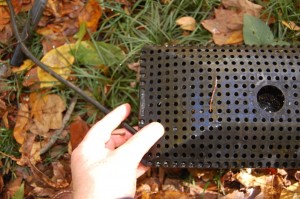
In addition to the fish pond, there is a cascade. Water in the large (50 gallon) pool at the bottom is pumped to the top pan (5 gallon) and cascades down the 3 cascade pan to the bottom. The pump for this set is about 150 G/H and sucks in a lot of stuff. After replacing the pump because of jams a couple of times, I came up with a filter system that seems to work. I used a plastic basket that you may be able to find in the same area of the store where the pumps are sold. The baskets were originally intended to hold the roots of water-plants together when they must be removed to clean the pond. I used the a square piece of plastic (cut from the bottom of a cat litter pan) to make a bottom. The bottom is loosely retained with a couple of rings made with wire, twisted to close them. The hose of the pump is punched through a hole cut in the bottom (now the top) of the basket. The trash filter on the pump acts as the final defense but the plant-basket filter provides a large area screen that is fairly fine. The only problem I have had is if it goes more than a week, the suction on the clogged basket filter flattens the basket. Regular maintenance is essential.

Pump exposed
Pump exposed

I usually just leave this pump running when cleaning. Lift the pump and filter out of the pond. Detach the hose from the pump to free the basket-filter. Use a hose or brush to clean the filter. Use a hose or brush to clean the trash filter on the pump. Put the hose back through the hole in the basket and insert the pump outlet in the hose. Close the white lid, lower into the water and check the flow. Put the brick back on the basket-filter to keep the lid closed.

Garden Pond Pump Maintenance

View of Pond
View of Pond

On our lot in a subdivision, I have 4 small artificial garden ponds. My wife likes the sound of falling water so 3 of the ponds have a pump to create a fountain or waterfall. As the water circulates, the stuff that falls in the pond eventually ends up trying to go through the pump.
I have spent a bundle of money over the years replacing pumps that have become clogged or jammed. In an attempt to avoid this, I have put filters on each of the pumps. The pump filters need periodic maintenance. I have discovered that during the spring, summer and fall, the right period is once per week. If weather does not permit doing it each Saturday, it can go one more week but no more. By the end of the second week, the filters are so filled with stuff that the pump is straining with reduced flow and there is the possiblility of jamming on something that would normally wash through.
The largest pond has a few goldfish. They winter over as it is warm enough here that the pond does not stay iced over. As the main problem with the filter and pump on this pond is brown algae, cleaning once a month is frequent enough in the winter.

Pump and filter components

This set up was purchased as a unit with a filter box, a pump, tube, assortment of fountain heads, coarse filter media, fine filter media, and something called bio-filter balls. I believe these are intended to provide a place where beneficial organisms can attach and aid with the chemical balance in the water. Since the garden pond is large and replenished with rain water, I have never been too concerned about the chemistry of the water. Except that if I do have to add significant amounts of tap water, I use a conditioner to control chlorine.
The spray head makes an a spray which is too large in height (it blows away) and size (lands outside the pond) if unregulated. There is an adjustment that allows some water to bypass the spray head to control the size of the fountain plume.
To maintain this pump, first turn off the power. The circuit has a switch at the deck.
Next lift the filter box out of the pond. Wire bails have been added to help with the lifting.

Wire Bails for lifting.

First remove the fountain pipe at the joint in the middle of the pipe just below the regulating valve. Gentle twisting may be required to get the valve to separate from the lower pipe.

Removing Filter Cover

Next remove the filter cover. A tab at each end of the filter cover keep the cover on the filter box. These need to be lifted slightly away from the box to release the cover. Inside you will find the coarse filter media (brown). Remove this layer. Use a hose sprayer set to “Spray” to wash all of the algae and leaf material out of the coarse filter. Wring the media to get the water out once or twice and rinse until the water runs clear. Repeat for the fine (green).
Underneath the fine filter media are the bio-filter balls.

Bio-filter Balls
Bio-filter Balls

Remove each of the balls and rinse it with the hose spray.
The spray fountain needs to have the top cover removed from the bottom part. This is done by gently unscrewing (top counterclockwise) until they separate. Inside you will see a labyrinth in the bottom to distribute the water and the holes in the top. Both of these tend to catch debris and need to be thoroughly cleaned. Make sure that all holes are clear. Poke them out with a toothpick if required. Re-assemble by screwing the top back on the bottom. Take extra care not to cross-thread. There is no need to screw it on tight, a bit more than a full turn is enough.

Fountain Head Detail

The pump is held into the filter box with suction cups. For weekly maintenance, you can just leave it in place. Rinse the box with the spray and empty the dirty water out. About once a month you will need to remove the pump from the box and clean it thoroughly. To clean the pump, insert and gently twist a screw driver in the vertical case split on the bottom on the end away from the intake and outlet. Gently slide the case apart to reveal the pump impeller. Clean any material from this area. There is normally no need to remove the impeller retainer.

If there is debris in thhttp://www.brafetishpage.com/blog/e pump impeller area, first, make sure the power is off.  Then rotate the impeller retainer counter clockwise until the tabs that retain it at the edges are clear of the case.  It may be necessary to pry it lightly to separate it from the bearing plate. plate.  The bearing plate has an o-ring around the edge.  Grasp the post in the center by the pump inlet and lift.  Help it with a screwdriver if required.  The pump impeller, shaft with a bearing at each end, and ferro-ceramic magnet can now be lifted out.  Clean everything.  Put the shaft of the magnet back in the motor.  Replaces the shaft retainer, taking care to center the bearing.  Do not force.  Slight pressure should re-seat the o-ring.  Replace the cover plate and rotate the tabs into the grooves in the case.

When the pump is clean, replace the cover and slide it to the stop.
Reverse the disassembly to assemble the pump and filter. Bio-balls, 4 in one end, 6 in the the other, fine filter, coarse filter, cover, bails. Re-insert the fountain pipe. Place the filter box on the bricks in the bottom of the pond and ensure that it is stable. Turn the power back on and check the fountain is flowing properly and that the plume is falling back into the pond.

Bad News, Good News

Saturday, my son and I were cutting up the accumulated brush and fallen limbs from 3 years of dry weather. I try to keep the pile small so it is not unsightly. But with the drought that we have had, I did not feel it was safe to burn. I had started on it a year or so ago when my old McCulloch chainsaw went bust.

Bad news: New Homelite chainsaw in hand, we were cutting off small lengths and burning to make a pile of coals to grill some hot dogs.  We had got about 20% of the pile done, and actually about all that we could do in that afternoon, the exhaust note changed from a motor sound to a sharper, harder sound.  I thought at the moment that it sounded like a large model airplane.  My son pointed to an object on the ground where I was cutting.  I quickly stopped the saw.  It seems the screws had come out of the muffler and the muffler had fallen off.  No wonder it sounded like a model airplane.  It was just like a 2-stroke model airplane engine with no muffler.  As in a model airplane engine the combustion chamber is open to the world when the piston clears exhaust port.  Big noise.  And the screws were nowhere to be found in the rubble and stubble under the brush pile.

That was on Saturday.  I was busy Sunday and Monday but had Tuesday off.  I called the Homelite toll-free help number.  The menu options had changed to better serve the customers.  The number one option on the first menu was “…to get the correct fuel-to-oil ratio for your power tool”. Option 2 was anything else.  The second menu was “Order parts or supplies press 1” and “Talk to a representative press 2”.

There was a hold as all representatives were “serving another customer”.  But that hold was less than a minute.  Shana was very helpful.  I gave the model and serial number.  She responded that “If it has been less than 30 days, you can take it back to Home Depot.  If more than that, you will need to take to an authorized service location”.  Now that is some information system.  That indicates that that lot of tools was sold through Home Depot.  She further suggested that she get my zip code and gave a choice of two locations for Authorized Service, both about 10 miles away.

Next to find the receipt.  My wife went through a pile of recent receipts.  Not Found.  Then she remembered that that receipt was on a magnet on the side of the refrigerator.  It turns out that I had bought the saw 32 days before.  Receipt and map to 5 Points Mower Repair, I headed out.

Home Depot is about 2 1/2 miles away.  I took the saw in to the returns desk, setting off the loss prevention alarm on the way.  A young woman named Meg listened to my story and asked what I wanted to do.  I suggested exchanging just the saw since I had used the oil and written in the book.  She suggested that I just get a similar saw off the shelf and exchange the whole thing.  So that is what I did.  She typed in the return reason in the register and gave me back the old receipt. About 3 minutes elapsed time. Homelite customer service and Home Depot return experience are pretty Good News!

Chainsaw Massacre

I had planned to do an article about the successful resuscitation of my 14 year old McCulloch chainsaw.  The bad news is that the operation was not successful and the patient is mostly dead.  I asked my friend and former neighbor Doug if he had any ideas.  Doug restores antique small engines and knows a lot about these things.  His advice was throw away the McCulloch and get a Homelite.

So that is what I did.  Hurricane Ida blew through here with a bit of wind and a lot of rain.

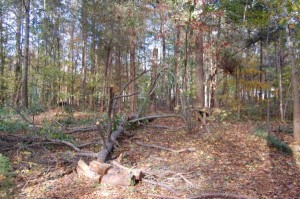
Dead Pine Down
Dead Pine Down

A dead pine tree blew over.

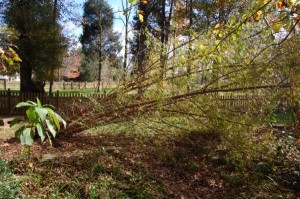
Austree Toppled by Huricane Ida Rain

And an Austree that had previously been laid low by ice apparently became waterlogged at the top because it fell down after the rain had stopped.  They needed to be cleaned up.  And with a clear direction on the chainsaw front, I went looking for a Homelite.

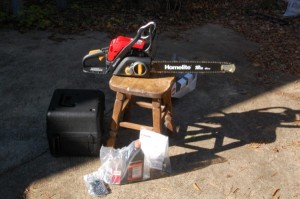
Lowe’s did not have them.  They had Paulen (budget) and Husqvarna (pricey).  I had used a neighbor’s Paulen while my saw was waiting repair and with the Homelite recommended, decided to keep looking.  WalMart does not appear to carry chainsaws.  Home Depot had Homelite and Echo.  The price to replace the 14″ saw was $99.  The 18″ saw was on sale at $130. A $20 savings.  Since the saws now have a nose guard that must be removed if you are cutting through wood longer than the blade, and I had sometimes been frustrated by the 14″ blade, I went with the 18″.

Homelite 18" Chainsaw
Homelite 18"

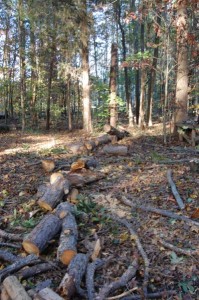
The end result was I was able to clean up the mess and spend two days carrying stuff to the brush pile.

Cut pine tree after chain saw purchase.

Log Planter

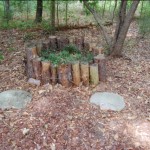
Typical Log Planter
Typical Log Planter

My wife likes to garden and in the hard clay soil, some things do better in a planter. Her idea was to arrange the logs in a circle, hold them together and fill it planter with potting mix. My son and I have made a number of them.
Cut a number of logs roughly stove length. If you like uniformity, use a gauge stick or a knotted rope as a measure. How many? About 3 1/2 times the planter diameter divided by the log diameter. For example say 3 feet across. Time 3 1/2 is 10 1/2 divided by 6 inches = 1/2 foot = 21 logs. Or in metric say 1 meter, times 3 1/2 = 3 divide by .15 = 23 logs. Cut the ends square so they will stand on end on the ground.
On previous planters, I used 16 guage galvanized wire. For this one, I used the soft iron wire used to tie reinforcing bars together for concrete. Find it near re-bar and concrete at Lowe’s or Home Depot. Galvanized doesn’t rust, in fact it stays shiny for years. I do not know yet how this darker wire will look or hold up but I suspect the darker color will be more aesthetic than shiny wire in a rustic planter.
If you choose the re-bar wire, you will need to draw it straight before you use it. Twist the end around something substantial, spool out enough to go around twice plus a bit more. In our example above about 15 feet (4 meters). Give a tug to take the kinks out. Do not cut the wire yet.
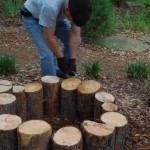
Arrange the logs in a circle where you want them to be. Put them as close together as they will stay.

Arrange logs on end in a circle
Wrapping with Wire
Wrapping with Wire

Wrap the wire around the logs two times keeping the wire close together and 1/2 to 2/3 up the sides of the logs.
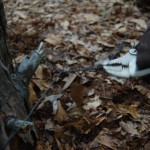
Pull the wire hand tight cross and twist it a couple of turns to tie the ends together. Have enough outside the twist to grab. Now cut the wire at the spool.  Do any final arranging of the logs. Pull tension on the twist and begin to twist up the excess to pull and hold the planter together.

Keep the turns close
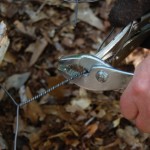
Cutting the wire
Cutting the wire

When the twist is about 2-3 inches (5 cm) from logs, stop twisting. This will be tight enough. And if you go to far, you risk breaking the wire.

Twisting with locking plier

I twist by the hand-over-hand method or by grabbing the twist with a locking plier and twisting. Either way keep tension on the twist as you twist it to keep the ends leading smoothly into the twist.
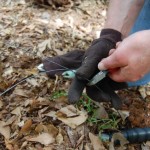
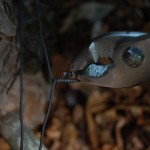
When it is tight enough, cut the twist.

Cut the twist
Cut the twist

Then turn the end of the twist back on itself and close the hook.  Press the loop flat so it will not snag on anything.  The cut end is SHARP!.

Bend the end of the twist back on itself

Tree-cutting

Last summer when everything was green and the leaves were out, I went through the woods with a marking tape and tagged a number of trees that were dead. Now that winter is here and the leaves are gone, it is time to take them out.
My son sharpened the chain-saw. His first time. It’s been used casually a couple of times and needed it. The first tree had already fallen since I marked it. The ants and rot had gotten into the lower part. The trunk had given way and the tree was leaning into a nearby tree. This is a particularly bad situation for cutting since it is difficult to tell which way the trunk is stressed and will move when cut. We set up some cargo straps as tensioners to try and persuade the trunk to move away from the current lean. This was supposed to let the trunk come off the stump after it was cut. He cut a wedge to give the tree a place to lean and the cut from the tension side to get it to break. It did not go as planned and fell into another tree. We dragged the butt away from the stump until it came down.
We cut down and cut up 3 trees that day. A few weeks later we cut down 3 more and cut up 4, including one that had fallen in a wind storm.
Subsequently, we gave a chain-saw lesson to the my daughter, her friend and my son’s friend.

Leaves

I got up early this morning so that I could take pictures in Fountain Inn of the Fall weather. I have posted a few of them at the Weather Underground picture site. I will select a few more perhaps and put them up to Flickr. When I got back Elvis was sleeping.

I started raking after the pictures were up, took a break for lunch. After lunch, I brought Elvis outside to help me. He wandered about while I raked. If he got too far I would bring him back, hold him a bit, give him some pats, set him down, rake some more, repeat for about an hour.

I still have the back yard to do. I had better get back to it to finish before dark.

Fall Cleanup

I spent the weekend with my wife cleaning up the gardens for the fall. She likes to cut back all of the perennials. She usually does this with a sharp kitchen knife. She did this year too. But when it cam to the liriope, I was able to help by running the lawnmower over it. I just set it up to the high setting (actually the setting I usually use for the grass), check for rocks and stuff in the garden and make a slow pass over the liriope.

She wanted to cut back a large rose-of-Sharon. My son fired up the chain saw and we cut away about two-thirds of that. It tripled the size of the burn pile.

Some of the late blooming and perpetually blooming flowers she saves. While there are not many bees still active, they find and utilize available blossoms. Pineapple sage, blue daze (evolvulus), Mexican heather.

Gone are the lantana, grape, wisteria, morning glory, cleome (beeweed), most of the petunias and numerous other varieties that I do not know the names.

The clean-up process is made more enjoyable by the mints in the gardens. There is fresh mint, spearmint, peppermint, and lemon balm. Also there is lots of rosemary. And of course there is cat mint (catnip).
When she cleaned up the catnip, all of the cats that were around got hunkered down in it.

Always enjoyable when outside are the songs of the birds, seen (chickadee, cardinal, and jay) and unseen (starling, woodpecker).

When you are turning over and cutting back you find lots of things that hide most of the time. A large leopard frog, a very large brown toad, and a centipede were seen. Also numerous squirrels, spiders, and insects.

The fire ants have not been killed yet in the front yard. With the rains, they must be being flooded out. I have put down Amdro 3 times but it has rained afterward and it does not seem to be effective yet. Usually, it works after just a couple of days. This is going on two weeks.

I took down the skyride as the traveller had become cracked. My wife will try to get a replacement. In the meantime, I took down the cable. I will turn it end-for-end in hopes of avoiding cracking the new traveller. It also will give the trees a break. When I had originally set up the cable, I had put it around two trees. To keep the cable out of the bark (and killing the tree), I put spacers under the cable in 3 spots. While they were growing into the bark a bit, they were relatively narrow and did not seem to cause any harm.

My son and I went to Lowes and got 24 bags of pine bark mini-nuggets noting that he had just vacuumed my station wagon yesterday.

Transporting all that was cut down to the back of the lot caused a lot of wear and tear on my tender new grass so at the end of the day, I ran the sprinkler on all of the warn portions in hopes of reviving it. It seems to look better.

Reseeding update

The front yard was planted several days ago. Here is a progress report.

The front yard was watered morning and evening for 20 minutes for 7 days. No sign of sprouting. There was a rain shower and sprouted blades appeared the next day. The backyard was planted the day after the shower and watered the same way. It rained (not a lot) on day 3 and again on day 4 (all day). Sprouts appeared on day 5. I think that rain is better than tap water for growing grass. It is growing up fine now. And we also seem to be getting rain nearly every day. At lunch time it was steamy.