American Girl Doll: Arm Repair

As with the leg repair, the arm repair can also be done by the manufacturer or perhaps be a local doll repair service. In Fig 2 below, you can see the pieces that result from a typical failure next to the repaired ball-and-socket joint. Note that the picture shows the ball-and-socket completely assembled. Doing it separately as described will help avoid getting glue inside the socket. I discovered this after the pictures were taken.
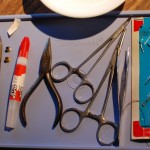
Picture of tools used for doll repair
Fig 1
Fig 1 nearby shows the tools that I used.  Cover the dolls head with a sock or plastic bag.  This will avoid spoiling and more important keep the hair out of the way while you work. Mark the torso, joint cup, and arm at the armpit for  proper alignment. This may not be strictly necessary as the parts seem symetrical but when taking apart something you have not disassembled before, it seems prudent.  Cut the stitches carefully to separate the shoulder socket from the torso.  Remove the plastic cup and broken elastic from the body.  The eyelet may be entangled in the body stuffing.  If this is the case, untangle it and stuff the stuffing back into the torso.

Mark the arm on the armpit side across the parting line where the half-ball meets the upper arm. Carefully cut along the parting line with an X-acto knife to remove the ball.  The plastic cup may be stuck in the arm and require extraction by tapping or reaching in with a tweezer or needle-nose plier.
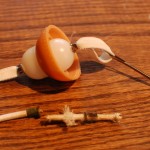
The re-assembled ball and socket joint for the dolls arm.
Fig 2
Use a candle-wick needle to draw a doubled 5 mm (3/8 inch) elastic through a 3 mm (3/16) eyelet, exitting on the flanged side.  Position the eyelet near the end of the elastic.  Crimp the eyelet. Next draw the elastic thru the bottom of the white plastic cup and out the top, then through the hole in the ball that was cut from the top of the arm, entering the flat (inside) and exitting the ball side. Clip or pin the elastic to prevent loosing it back into the hole.

Use a sparing amount of  super-glue to rejoin the ball the arm making sure to align the mark made earlier.  A weak solution (pinch of baking soda in 3 cc (1 teaspoon) of water) may be used to speed set-up of the super-glue and eliminate stickiness of any squeeze-out.

Draw the elastic though the cup side of the ball and out the back.  Draw the elastic through a second eyelet.  Test the tension and compare to an attached arm .  It needs to be tight enough to hold in place yet allow enough stretch to  give you room to stich the ball back into the torso. When proper length is found, crimp the eyelet.
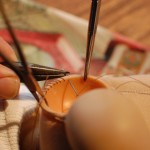
Doll's shoulder socket replaced in torso, clamped and partially stitched
Fig 3
Position the ball in the torso and hold the edge of the cloth flush with the edge of the ball. Use a glovers needle and a length of thread to stitch the ball+arm assembly back into the torso using an overhand stitch. 

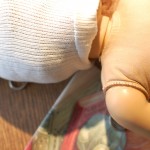
Picture of Doll's repaired shoulder
Fig 4
Fig 4 shows the completed repair.

Update on Leg Repair:  In one of the joints I repaired, there were a couple of washers strung on the elastic, I think possibly to keep the cord centered or reduce abrasion.  They do not seem to be essential and found only in joint out of 3.  Perhaps part of the original design but later dropped.
 

Leave a Reply

This site uses Akismet to reduce spam. Learn how your comment data is processed.