

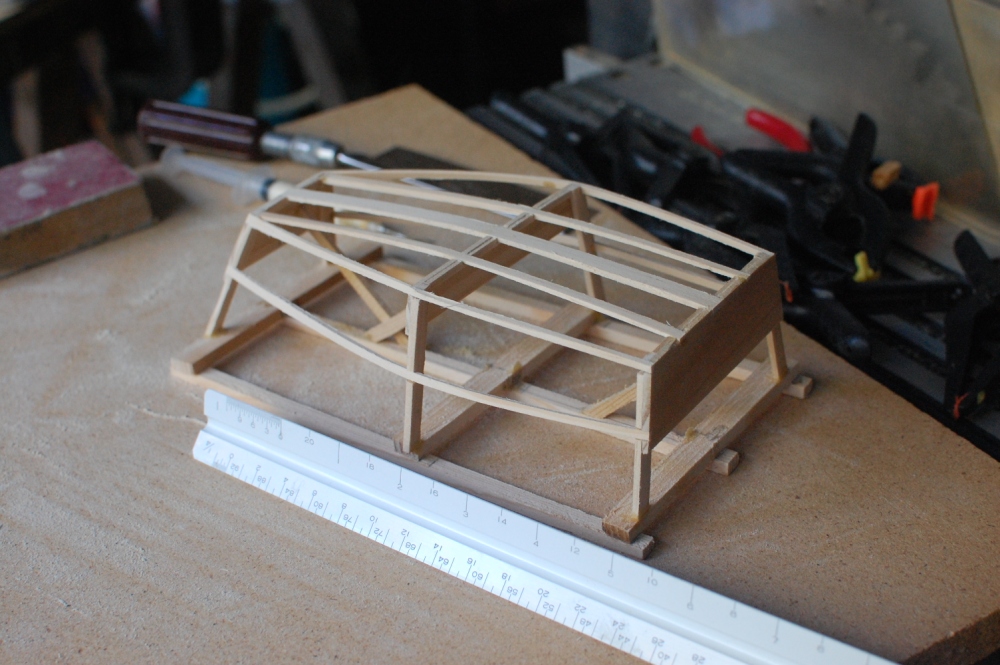
 . Setting up the actual boat frames was complicated. If you were doing it full size, you could use a tape measure and level or plumb-bob. As it was getting the measurements set up in the middle-of-thin-air took some clever clamp-measure-move-reclamp action to get it just right over several days as I had to wait for the glue to dry to do the next frame. I think that the center bulkhead is 1/16″ off-square which would be 1/2″ in full size.
Once the frames were set up, the corners were notched and the chines and keels were set in. A little sanding to shape. 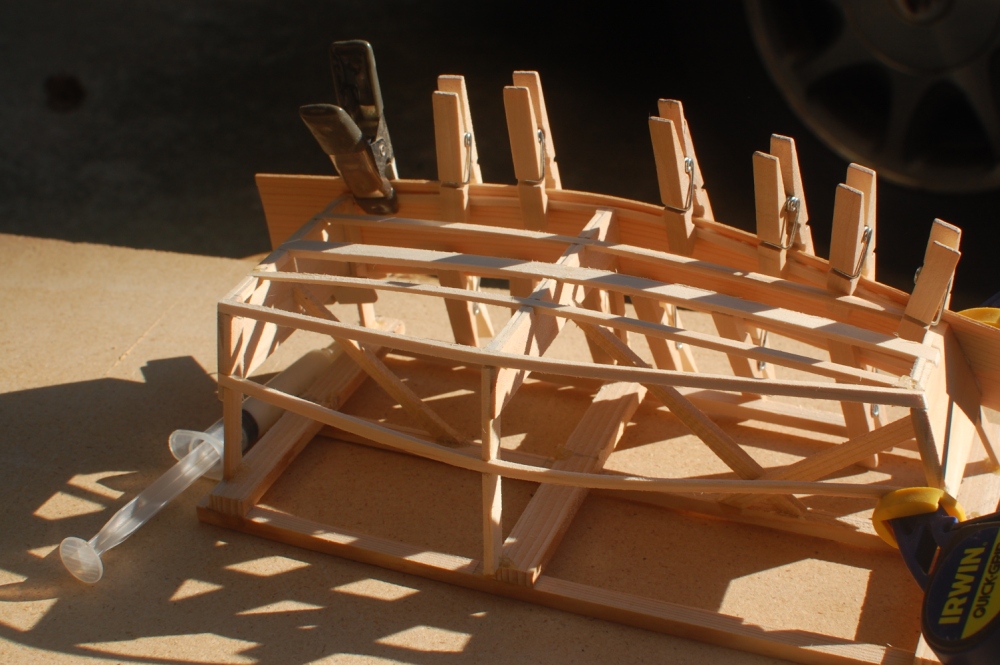
The rudder and centerboard were next along with the mast, boom, and sprit. Finish is varnish.
The sail was laid out with a program named Sailcut. It neatly lays out panels perpendicular to the leech givin a very realistic appearance to the modeled sail. The “eyelets” are dots of gold sparkle-pen ink. 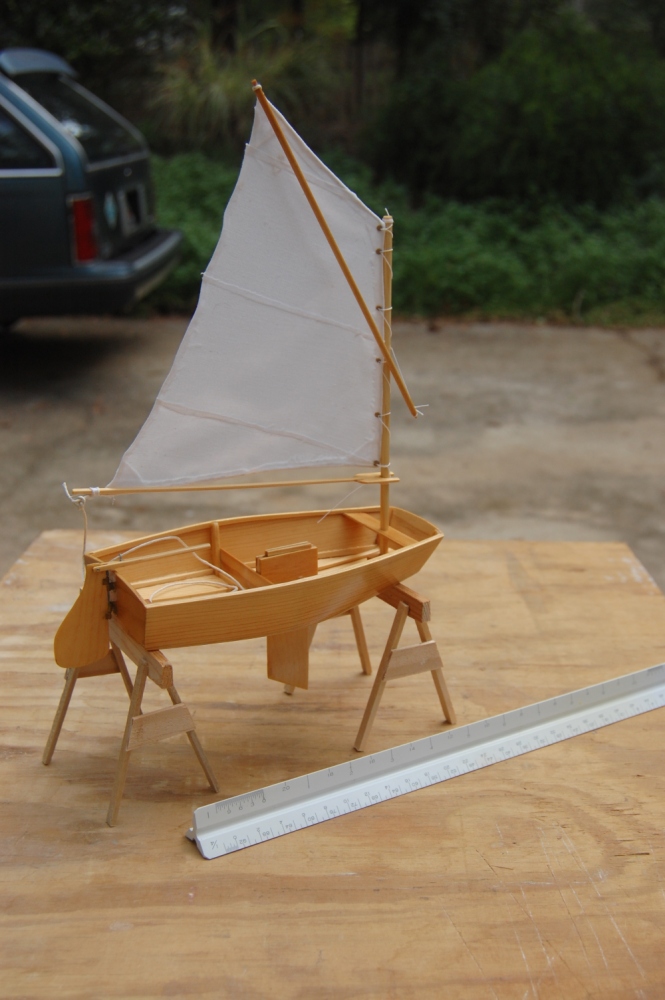
American Girl Doll: Leg Repair Revisited
Several years ago, I published a American Girl Doll: Leg Repair. I recently had the opportunity to do another repair and need to make a few revisions to my notes.
The dolls are now 17 years old. The doll in question is the oldest of the bunch. American Girl still provides a repair service and will re-attach arms and legs for a fee. They also return the doll with some “hospital visit” accessories such as a wrist band and a gown. There are doll hospitals in most large cities and individuals in smaller towns that provide doll repair. If you wish to attempt it yourself, here is one way to do it. Here is what I did this time.
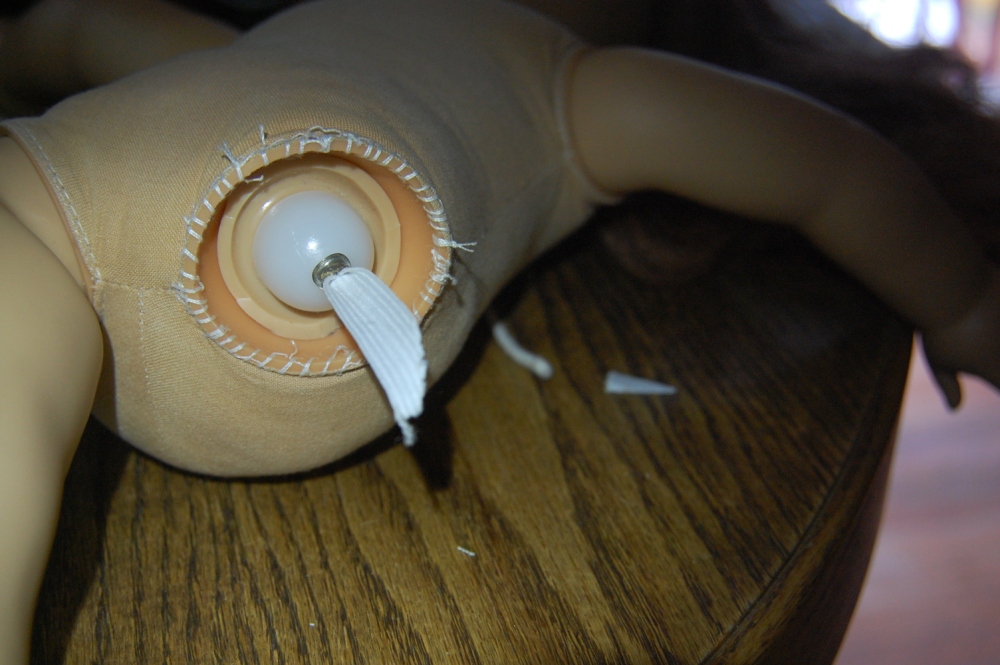
Undress the doll. This will avoid soil and glue problems. When I examined the doll patient, I noted that the detached leg had a ball-joint that mated with a socket sewn into the cloth torso. An elastic cord is retained in the ball and holds the two parts together. The leg appears to be one piece with a hole molded in the hip-joint. There is what could be a mold-parting-line but I theorized that it was glued or sonicly welded at assembly time. I marked a small index mark on the inside of the thigh at the line with a Sharpie and carefully cut off the top of the leg with and X-acto knife. The socket in the torso does not require alignment. Just carefully cut the threads where the socket is stitched in. Inside the leg there was a plastic cup loose and a piece of elastic with an eyelet squished onto it as a retainer. In the stuffing in the torso, was a similar cup and piece of elastic. I believe that the cups are to make the elastic long enough so that it can be tensioned but still stretch far enough that the leg can be worked on. 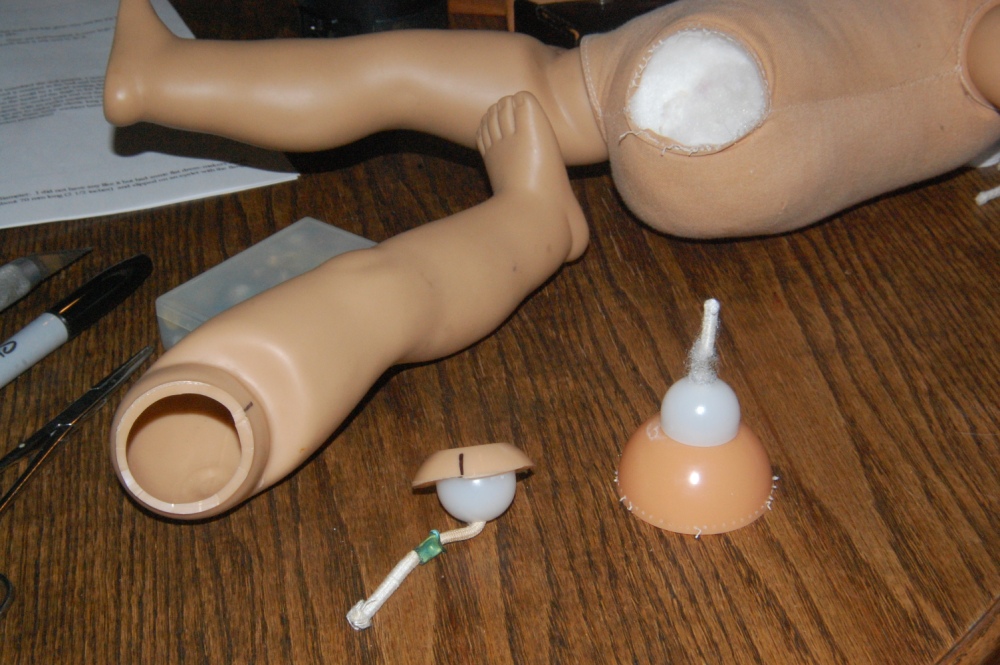
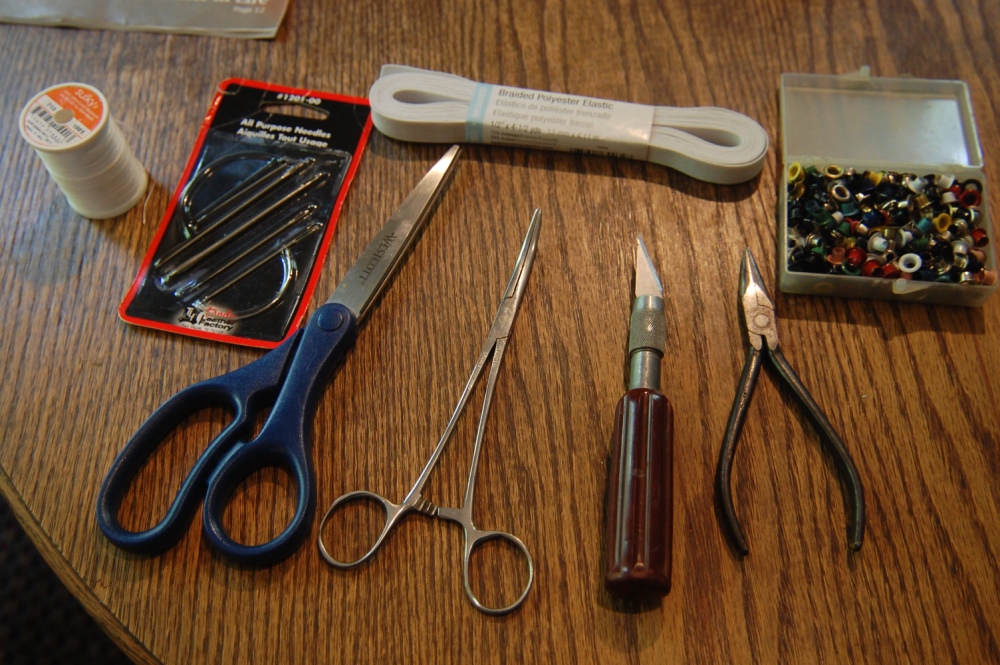
The original elastic is heavy-duty shock cord about 4mm (1/8 inch) diameter. I did not have any like it but had some flat dress-makers elastic about 13 mm (1/2 inch) wide. I used piece of elastic about 70 mm long (2 1/2 inches) and slipped on an eyelet with the flange away from the bitter end, drew it close and squashed the eyelet with a pliers to make a “knot”. I pushed the elastic through one of the cups so it came out the cup side. The cup should face the other way. The through the large hole in the severed leg-top. Next through the large hole in the socket, through the other cup and out the bottom. Last another eyelet is slipped on. Using another leg, estimate the tension required and pull the elastic up until the ball-to-socket tension is similar to a good joint. Mash the second eyelet to complete the assembly.
Place the socket in the torso with the alignment correct. Use hemostats or other small nosed clamps to hold the edge of the cloth aligned with the edge of the socket. The original socket was machine stitched but I used a glover’s needle and an overhand stitch to rejoin the socket and torso. A pair of pliers may be required to force the needle through the existing holes and draw it out the other side.
Separate the top of the leg from the socket with a hemostat, clothespin, or a pair of pliers. Put a small amount of gel type cyanoacrylate glue (CA or super glue) on the leg top where it was cut. Carefully replace the leg top matching the index you marked before cutting. Hold until set. The glue I was using remained sticky where it had squeezed out after assembly. A small amount of ammonia or a weak baking soda solution will cause this to set instantly.
<
Nikon Lithium Ion Battery Recovery
Occasionally I forget to turn off my Nikon SLR. This is especially true when I have connected it to download some pictures. The USB connection keeps the screen alive and the EN-EL9 battery pack is dead in less than hour. Usually it will recharge. But sometimes it will not stimulate the charger and will not charge, no blinky lights, nothing.
As I understand it, Lithium Ion (Li-ion) batteries have a circuit inside that limits the charge current and keeps them from overheating during charging. When the battery is completely dead, this circuit has no power and it cannot allow current in to charge the battery.
I have been able to get around this by putting the battery in the charger, unplugging the charger, wait a 10-count and then plug it back in. Repeat until it appears the charge cycle is working (flashing light on my Nikon MH-23 charger). Monitor the charger for a few minutes. If the light comes on solid too soon, slip the battery out of the charger and back in. Check for normal charging activity. I hope this saves you from buying a new battery.