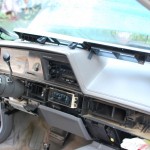
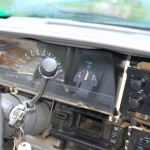
The 1995 Cutlass Cruiser instrument cluster lamps burned out. Actually, two of them had burned out 3 years ago. At that time, I exchanged the the two burned out lamps from the 0-55 side side of the cluster to the 55-110 side that I hardly ever use. Sometime in March, another bulb went making it impossible to see the speed at night. From the original disassembly, I remembered that it was a pain. Allow about 2 hours. Before beginning, make note of the positions of the dead lamps. It may be difficult to tell failed lamps.
For safety, disconnect the battery to disable the airbag. Avoid the yellow wires associated the airbag sensors and airbag. There are a number of screws (over 20) involved in this, so it may be useful to have piece of corrugated box to hold, organize and note the screw positions. Remove 2 screws from either side of the ALDL connector. This will allow the trim panel to be removed from the car in the next step. Remove 3 screws from the bottom surface and 2 screws from the bottom forward edge of the steering wheel trim panel. Remove and set aside.

Along the top of the back edge there are 6 smaller bulbs. These are type PC74 lamps and illuminate the warnings. There may be an extra in the “spare” slot that you could use in a pinch to replace a warning light. There are 8 PC194 lamps to illuminate the panel. A ninth PC194 lamp is located on the bottom edge to light the transmission selector indicator quadrant. This is the only lamp the dealers computer called out and it called it as a PC195. Dealer price is $15.00. Online price is $2.00. These PC lamps twist out from the flexible printed circuit with a 1/8 counterclockwise turn. Replace any failed lamps. You can test them on the bench with a 9-volt battery and test clips. Avoid wires associated with the airbag..
Carefully re-insert the instrument cluster plugging the PC connectors into the sockets. Start the 3 easy to reach screws. Reconnect the clip to the steering column collar. Use a piece of paper towel to retain the hard-to-reach left-hand screw in the socket and start and tighten left-hand screw. Tighten the remaining screws on the cluster. You may wish to temporarily re-connect the battery to check the lamps at this point. Disconnect the battery before proceeding.
Re-install the instrument surround and tighten the screws.
Press the long trim panel into place. Start all screws. Then tighten all screws.
Re-install the trim around the steering column.
Re-install the trim panel under the steering column.
Re-insert the vent directors. Note that there is a post on the outboard side of the the socket that keys with a slot on the director.
Finally re-install the ALDL socket.
Reconnect the battery.

Hold fast, run free – the blatherings of CBCalvin