 A tweet about a WSJ article authored by Penn Jillette that I read Saturday. The article led to an out-loud laugh when I read what it would take for Hummer to meet the fuel economy standard President Obama proposes. Mr. Jillette – this one’s for you.
Mobile Repair
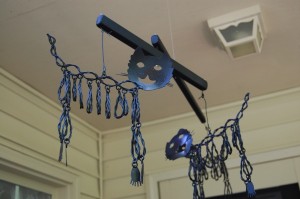
A year ago last September, my wife found some Halloween decorations at a closeout table at Dollar Store. They were wire sculpture cat profiles. I used them to make a mobile.
But with the stormy whether that we have been having, the fishing swivel that I had used let go so Tuesday I replaced it with a new heavier #1 swivel.
Bad News, Good News
Saturday, my son and I were cutting up the accumulated brush and fallen limbs from 3 years of dry weather. I try to keep the pile small so it is not unsightly. But with the drought that we have had, I did not feel it was safe to burn. I had started on it a year or so ago when my old McCulloch chainsaw went bust.
Bad news: New Homelite chainsaw in hand, we were cutting off small lengths and burning to make a pile of coals to grill some hot dogs. We had got about 20% of the pile done, and actually about all that we could do in that afternoon, the exhaust note changed from a motor sound to a sharper, harder sound. I thought at the moment that it sounded like a large model airplane. My son pointed to an object on the ground where I was cutting. I quickly stopped the saw. It seems the screws had come out of the muffler and the muffler had fallen off. No wonder it sounded like a model airplane. It was just like a 2-stroke model airplane engine with no muffler. As in a model airplane engine the combustion chamber is open to the world when the piston clears exhaust port. Big noise. And the screws were nowhere to be found in the rubble and stubble under the brush pile.
That was on Saturday. I was busy Sunday and Monday but had Tuesday off. I called the Homelite toll-free help number. The menu options had changed to better serve the customers. The number one option on the first menu was “…to get the correct fuel-to-oil ratio for your power tool”. Option 2 was anything else. The second menu was “Order parts or supplies press 1” and “Talk to a representative press 2”.
There was a hold as all representatives were “serving another customer”. But that hold was less than a minute. Shana was very helpful. I gave the model and serial number. She responded that “If it has been less than 30 days, you can take it back to Home Depot. If more than that, you will need to take to an authorized service location”. Now that is some information system. That indicates that that lot of tools was sold through Home Depot. She further suggested that she get my zip code and gave a choice of two locations for Authorized Service, both about 10 miles away.
Next to find the receipt. My wife went through a pile of recent receipts. Not Found. Then she remembered that that receipt was on a magnet on the side of the refrigerator. It turns out that I had bought the saw 32 days before. Receipt and map to 5 Points Mower Repair, I headed out.
Home Depot is about 2 1/2 miles away. I took the saw in to the returns desk, setting off the loss prevention alarm on the way. A young woman named Meg listened to my story and asked what I wanted to do. I suggested exchanging just the saw since I had used the oil and written in the book. She suggested that I just get a similar saw off the shelf and exchange the whole thing. So that is what I did. She typed in the return reason in the register and gave me back the old receipt. About 3 minutes elapsed time. Homelite customer service and Home Depot return experience are pretty Good News!
Cat Bed Again
My wife suggested that I needed to make another cat bed. Winter is coming on and there is no shortage of cats. Here again is how I do a quick-and-dirty cat bed.
This cat bed is not fine cabinet making. It is more like rough carpentry. But it makes a cozy bed that the cats seem to like.
This article refers to power and hand tools. Always use safe practices and follow all instructions provided by the tools manufacturer in using tools. Wear appropriate safety equipment. Failure to follow safe practices may result in injury.
After safety, the next thing to consider is how big to make it. If your cat curls up in a particular cardboard box or box lid, that is one place to start.
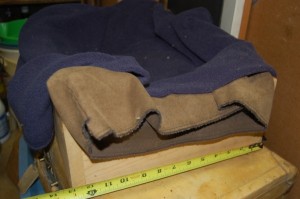
I have never written down what size (before now) so I usually start by measuring an existing cat bed. This one will be 11 1/2″ x 16 1/2″ inside. 13″ x 18″ outside. These boxes get used by cats from 8 lbs to 19 lbs.
Another question is how deep to make it. Stock 1-inch lumber comes in 1×4, 1×6, 1×8, etc. I have made beds in all three depths. The shallow ones are occupied in summer and the deeper ones in the winter. Most of ours are made from 1×6.
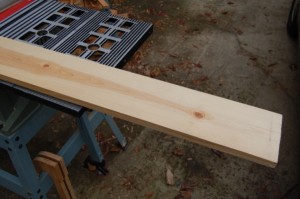
When you select lumber, avoid edge knots, loose knots, and warps. But other than that you need not be picky. If you want to be fancy, oak makes a nice box as does cedar. I am using regular white pine here. The box is formed from two long sides that that lap the short sides so measure for 2 pieces 11 1/2″ long and two pieces 18″ long.
Cut these 4 pieces. Also find or cut several pieces of scrap wood to test the kerf formed in the operations below.
Trim the ends so both short sides are the same and both long sides are the same.
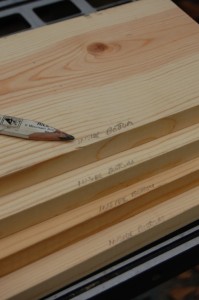
Choose the side that is less attractive on each piece. This is the side that will be inside where it will be covered by the blanket anyway. Choose the edge that is least attractive. This will be the bottom where the groove for the floor is. Mark the inside (ugly) side of each piece at the bottom.
Next adjust the saw to cut the bottom side of the groove. Set up your saw so the the fence will provide a cut that begins 1/4″ from the bottom edge.
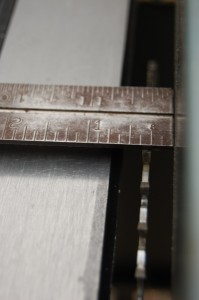
You can use a larger measurement. This will make the bed shallower and provide a large air space. The trapped air provides insulation. Measure from the side closest to the fence.
Raise the blade to a measured 3/8″. I used 1/4″ in the illustrations but have used 3/8″ in the past.
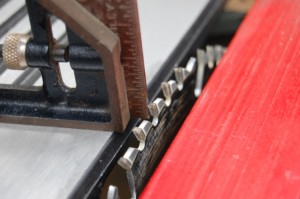
Using 3/8″ provides a deeper groove with more “slop” on the fit for the bottom. Using 1/4″ reduces the chance that the channel will split.
On my saw, I must remove the blade guard and splitter to perform the required operation below. If your saw is similar, use extra caution while working with the unguarded saw. This means using hold downs, fingerboards, and pusher sticks as suggested by the operating manual for your saw.
Pass a piece of scrap through the saw. Stop the saw. Measure the distance from the edge and the depth of the kerf. Adjust until satisfactory. Cut several pieces of scrap to the final setting. The extra scraps will be used to adjust the other side of the cut.
Pass each of 4 pieces, properly oriented through the saw. This forms one side groove. Make sure that each piece is held down snugly and against the fence as it is passed through. Check each piece to make sure the groove is straight on the bottom edge and that the bottom of the groove is flat.
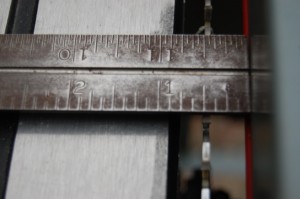
With the saw stopped, reposition the fence so that the side of the blade away from the fence is far enough away to complete a groove the thickness of plywood bottom. Using one of the pieces of scrap, cut the groove. Use a 1/4″ chisel to remove the waste. Verify that the groove is a snug fit on the plywood. Adjust until satisfactory.
Again pass each of 4 pieces, properly oriented through the saw. This forms other side of the groove.
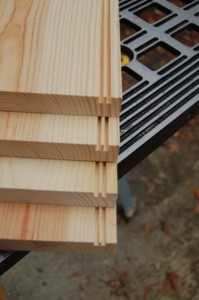
Make sure that each piece is held down snugly and against the fence as it is passed through. Check each piece to make sure the groove is straight on the bottom edge and that the bottom of the groove is flat.
Carefully use a 1/4″ chisel to remove the waste.
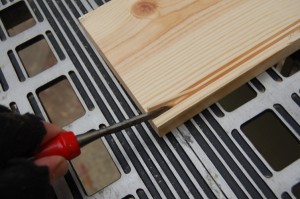
Do a trial assembly without the bottom using clamps and check the measurements.
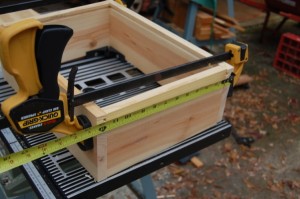
You will want the to cut the plywood bottom just a scosch smaller than the distance between to bottoms of the kerfs. Measure carefully. You can easily see the bottoms of kerfs on the ends. Harder to measure is the long dimension. But it is the outside length – 1 1/2″ + 2 x kerf depth (nominally 3/8″ times two). Do the calculation then measure to the wood and verify by eyeball that your calculation is correct.
Measure the plywood and cut. If you prefer, you can cut a bit oversize, then make trimming cuts until the sides fit properly.
Sand the sides if desired. Finish if desired. We typically leave the beds bare wood.
Mark the long sides for drilling 3/8″ in from the end and 1 inch from the top edge and bottom edge.
Assemble the sides and bottom.
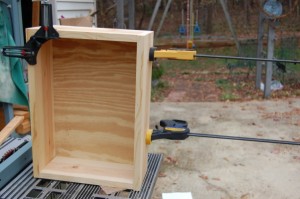
Clamp the assembly.
Drill and countersink for screws.
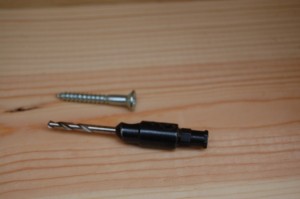
Screw together with 1 1/4″ screws. Brass screws are best for outdoor use. When I drive brass screws, I pre-drive and then remove a steel screw the same size. Regardless of which kind, I soap or wax the screw to reduce driving friction.
When the screws are in, line the inside with a piece of Polarfleece® or similar material.
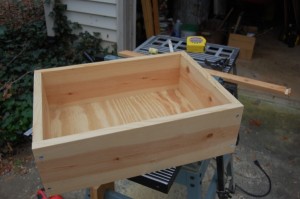
Set it in a place where your cat will feel safe.
Chainsaw Massacre
I had planned to do an article about the successful resuscitation of my 14 year old McCulloch chainsaw. The bad news is that the operation was not successful and the patient is mostly dead. I asked my friend and former neighbor Doug if he had any ideas. Doug restores antique small engines and knows a lot about these things. His advice was throw away the McCulloch and get a Homelite.
So that is what I did. Hurricane Ida blew through here with a bit of wind and a lot of rain.
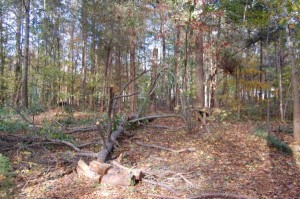
A dead pine tree blew over.
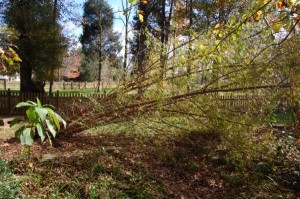
And an Austree that had previously been laid low by ice apparently became waterlogged at the top because it fell down after the rain had stopped. They needed to be cleaned up. And with a clear direction on the chainsaw front, I went looking for a Homelite.
Lowe’s did not have them. They had Paulen (budget) and Husqvarna (pricey). I had used a neighbor’s Paulen while my saw was waiting repair and with the Homelite recommended, decided to keep looking. WalMart does not appear to carry chainsaws. Home Depot had Homelite and Echo. The price to replace the 14″ saw was $99. The 18″ saw was on sale at $130. A $20 savings. Since the saws now have a nose guard that must be removed if you are cutting through wood longer than the blade, and I had sometimes been frustrated by the 14″ blade, I went with the 18″.
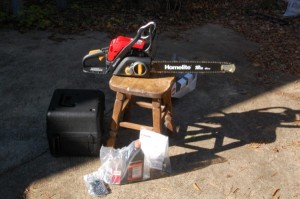
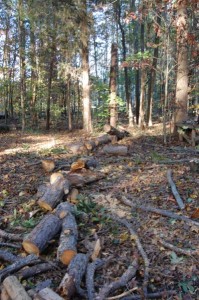
The end result was I was able to clean up the mess and spend two days carrying stuff to the brush pile.
TPS replacement
No, not the TPS report from Office Space but the throttle position sensor in my daughter’s 1993 Olds Ciera.
The Check Engine light was on last time she was here. We read it out with the Actron CP9135 scan tool . The code 22 indicated that the voltage on the TPS was low. Since this is a 1993 Oldsmobile Ciera, replacement was probably indicated.
She brought the part with her for this visit.
The TPS on this 3.3 MFI engine faces down toward the upper radiator hose pipe. No clearance for a normal screw driver. If we had had a flat ratchet offset style driver, that would have been ideal. Lacking that, after disconnecting the battery and removing the air cleaner and its mounting plate, we used a needle-nose vise grip to break the 2 screws loose. Then used a #1 Phillips tip in a holder to get them out. Replacement was a matter of holding the screws in the TPS while aligning the paddle that is pushed by a similar paddle on the throttle shaft. Starting both screws by finger, running them in with the mini screwdriver and snugging them with the vise grip. Reconnect the battery and test. Put the air cleaner mounting plate and air cleaner back on. Clamp the air inlet hose where the strap had broken and done.
Flower Flyer Rebuild
The Flower Flyer started as a re-build. My wife had found a rusted coaster wagon in someone’s trash and dragged it home. I built a body for it and painted it green. Phillip made a stencil and painted Flower Flyer on the sides. It was a pretty thing.
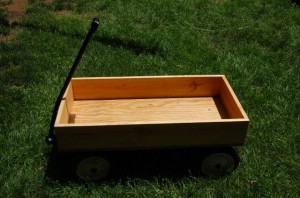
But the outdoor storage was hard on it and it developed dry rot. Time for a new body. I was sure that I had a picture of it but cannot find it. After I took it apart, I took a picture of the body as it was.
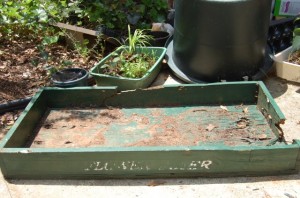
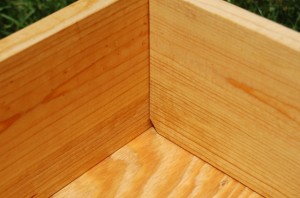
Using a sheet of 3/4 inch plywood and higher 1×6 pine sides, I built the new body. This time I put scuppers in it so the body would drain better. I used brass screws to reduce the rust and the start of rot. I also treated all of the parts with linseed oil and pine tar before assembly. Here is the new Flower Flyer.
- Scupper Detail on each corner
Code for Clock Face
Two parts, the clock face code (including some required functions) in this post and next the Hands in a later post.
Here is the code that generates the clock face: Continue reading “Code for Clock Face”
Austin Healey
I took some pictures of this great restoration of an Austin Healey 100 yesterday. John Burton is a neighbor has spent years working on this. The results are definitely worth the effort. What a great job. Additional pictures in a new window. My son took some of the pictures while the hood was open.

Making Glass Beads
My daughter was home for the holidays. Most of the days were rainy but we had at least one nice day when we could be outside. She took the opportunity to make glass beads. My son took this picture. The glass rod is melted and gathered on a mandrel, additional colors are added. The bead is then cooled slowly.
